
How To Small Particle Clean (SPC)/Decontamination Clean Your Mouldy Contents
This information is general education only and is not a substitute for a site-specific inspection or remediation advice. Homes and contamination levels vary, so professional assessment may be required.
What Is Small Particle Cleaning?
Small particle cleaning is the removal of:
mould spores
mould fragments
endotoxins
actinomycetes
dust that mould grows on
It is commonly used:
After mould remediation
When moving out of a water-damaged home
When bringing belongings into a clean home
For people with CIRS or mould sensitivity
Think of it as spring cleaning with a specific goal - removing contamination, not just making things look clean.
Why It Matters
As an inspector, I often find homes where:
The building has been remediated
But the contents are still contaminated
Moving contaminated belongings into a clean home can cause ongoing exposure and symptoms, especially for mould-sensitive people.
Step 1 - Decide What Can Be Saved
This is the most important step.
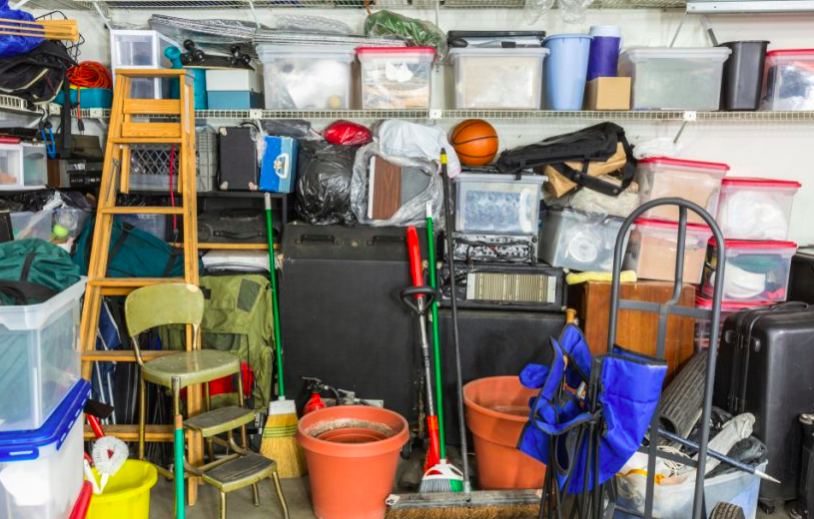
Usually salvageable:
Non-porous items like:
Glass
Metal
Hard plastic
Sealed timber furniture
Mould generally grows on dust and residue sitting on top of these surfaces, rather than growing into the item itself like with porous contents (which are harder to save).
Often not salvageable:
Porous items like:
Cushions
Pillows
Mattresses
Foam items
Thick stuffed toys
Fabric couches
Spores and fragments embed deeply into porous materials and it is near impossible to truly, fully remove them.
Even if they look clean, they can continue releasing particles into the breathing zone.
Very small cushioned items under about 2–3 cm thick may sometimes be machine washed.
But thick porous items often need to be discarded if contaminated.
It can feel very wasteful, but it is about protecting health.
Step 2 - Understand Material Types
Cleaning difficulty generally follows:
Non-porous (easiest to clean) → Semi-porous → Porous (hardest to clean)
Examples:
Non-porous - glass, metal, sealed plastic
Semi-porous - sealed timber, leather, plastic in poor condition
Porous - fabric, paper, foam
Clothing is porous but can usually be washed (if not visibly mouldy).
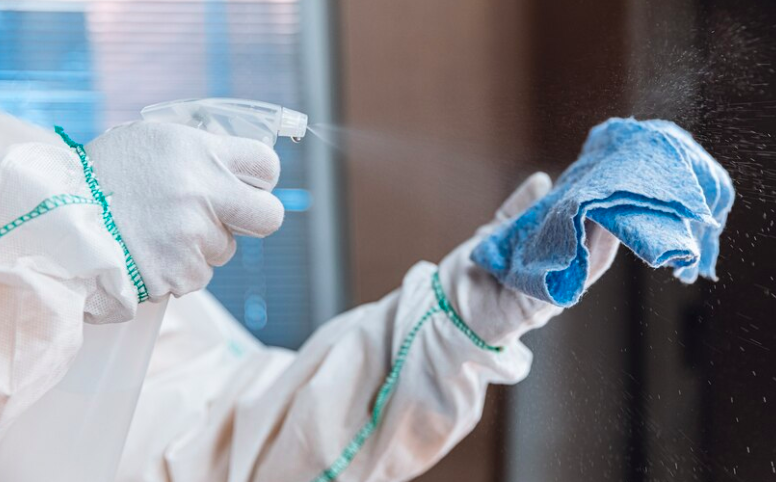
Step 3 - The Basic Cleaning Method
(Known as The HEPA Sandwich)
The standard process is:
HEPA vacuum item (this means using a vacuum with a good, sealed, HEPA filter so that spores aren’t just blowing out the back of the vacuum back into the environment)
Damp wipe with microfibre cloth and hot soapy water
Dry wipe with clean microfibre
Repeat as needed depending on contamination level or sensitivity.
This removes particles.
Some other tips:
Don’t dunk your damp microfibre cloth back into a dirty bucket of water over and over again (I made this mistake when doing my contents), you want to have a spray bottle set up, and then you lightly spray the cloth and wipe the item - that way the cloth is always clean.
Fold the cloth over as you go, so that you’re mostly using a clean side as you wipe. If the cloth looks dirty, it is spreading contamination.
The best cleaning solution is a surfactant, basically any dish soap. Add 1 L water to your spray bottle, plus 5-6 drops of dish liquid (low tox is fine) (if you add more than this amount, you’ll be leaving a greasy residue behind on everything).
Clean outside, not inside, so that you’re not removing particles into the cleaned indoor space. Garages or patios usually work well.
Get organised before you start, have items categorised, have a system in place - it can be very overwhelming.
Cleaning warehouse stores often sell bulk swiffer cloths (which you can use instead of microfibre cloths). They also sell mops that swiffer cloths can attach to if you are conducting HEPA sandwich cleaning on your ceiling/walls/floors.
Ask for help - this is usually not a one person job. It’s not difficult, just very time consuming when done alone.
You can store contaminated items in plastic tubs and clean them at a later date - and just clean the items you want to have back in the house immediately. Also, for items you don’t want to get rid of but also don’t want to discard - just store them in plastic tubs. Make sure you label these tubs with an “X” so that you don’t forget they’re contaminated.
It is normal to feel overwhelmed doing this - it will be your least favourite cleaning day/s you’ve ever had in your life - but once it’s done, it’s done.
Step 4 - Using Compressed Air Safely
Compressed air can help with blowing dust/particles out of:
Electronics
Small crevices
Items with nooks & crannies
But only use it outdoors or in containment, because it aerosolises particles.
You’ll still need to HEPA sandwich the item, even after blowing it out.
You can buy electric air blowers online or just cans of compressed air.
Step 5 - Microfibre Cloth Technique
Fold cloths into quarters. Use one side once only, then refold.
This prevents spreading contamination.
Wash reusable cloths hot at 60 °C+ and dry thoroughly, though if you have CIRS, it is best to discard the cloths. That way you also avoid bringing them all into your laundry whilst contaminated. You don’t need to discard microfibres you use generally, just for a big decontamination job like this.
Disposable microfibre cloths, or swiffer cloths, can be useful for large cleans.
Step 6 - Laundry Cleaning
Clothes that smell strongly musty may not be salvageable for mould-sensitive people. In fact, I would recommend discarding them - or gifting them to someone not mould sensitive who doesn’t mind.
Some people online say that all clothes must be discarded and will never be truly free of contamination. Personally, I haven’t found that to be true for myself or any of my clients. This may be true if the clothes are stored in a wardrobe or area with very serious mould contamination right in that area. But I would still try to wash a load of the clothes and then check for reactions to them before discarding straight off the bat.
Wash clothes 2–3 times using regular laundry detergent. Washing 3 times is recommended where Chaetomium has been found in the samples taken in your home.
Make one of the washes a hot wash. You don’t need to take the clothes out of the machine and hang them out between washes, just keep the machine going.
Best case is to dry them in the sun after, but dryer is fine too.
Make sure the washing machine and dryer you’re using for this aren’t contaminated with mould.
*You can also elect to have your clothes dry cleaned - but note it’s usually expensive and the chemicals used are not low-tox and very often bother people who are chemically sensitive.
IMPORTANT: Do Not Bring Cleaned Items Back into the home Until PRV Is Passed
One of the most heartbreaking situations I see is when clients do a huge small particle clean… and then re-contaminate everything by moving items back into a home that is not yet verified clear.
Before returning contents, the home should pass a proper Post-Remediation Verification (PRV) performed by an independent assessor.
A proper PRV confirms that, at the time of inspection, the building has returned to Condition 1 or normal indoor fungal ecology - not just that it’s visually clean.
If you move items back too early, you can re-seed contamination onto everything you just cleaned.
That means:
cleaning twice
ongoing symptoms
wasted money
huge emotional stress
So:
Clean items → Store items → Wait for PRV clearance → Then move back.
It feels slow, but it protects all the work you’ve done. If you’ve got comments, leave them in the box below & I’ll do my best to get back to them. This doesn’t include every single detail or possible scenario for small particle cleaning, but it’s a good place to start for those new to it.